Format your C++ code now!
Code formatting plays a crucial role in software development. Properly formatted code offers better readability, consistency, and understandability, leading to efficient collaboration among developers. It aids in debugging and troubleshooting, enhances version control and code maintenance, and reduces the likelihood of introducing errors.
Sometimes, developers tend to overlook the importance of code formatting. For example, there are almost no mandatory checks on coding style in all undergraduate labs and projects. When we usually write code, we all know that we need to obey a certain code style specifications, such as Google style, but this is actually due to programmer self-restraint. Programmer’s negligence and continuous iteration of code can easily lead to rule violations. So here you need the help of some tools.
C++: Using clang-format & clang-tidy
clang-format
clang-format is a command-line tool and part of the Clang compiler project. It is designed to automatically format C, C++, and other programming language code according to a specified coding style.
Basic Usage
Installation
1
sudo apt-get install clang-format
In order to format our code, we need a configuration file
.clang-format. This file could be generated from some pre-configured styles.To generate
.clang-formatfrom stylellvm, run the following command in the terminal.1
clang-format -style=llvm -dump-config > .clang-format
Other candidate styles include
google,chromium,mozilla,webkit,microsoft.We could further modify the
.clang-formatfile using our preferences. Below is my modified format file. More style examples could be found from Clang documentations.1
2
3
4
5
6
7
8
9
10
11
12
13
14
15
16
17
18
19
20
21
22
23
24
25
26
27
28
29
30
31
32
33
34
35
36
37
38
39
40
41
42
43
44
45
46
47
48
49
50
51
52
53
54
55
56
57
58
59
60
61
62
63
64
65
66
67
68
69
70
71
72
73
74
75
76
77
78---
Language: Cpp
# BasedOnStyle: LLVM
AccessModifierOffset: -4 # -2
AlignAfterOpenBracket: Align
AlignConsecutiveAssignments: false
AlignConsecutiveDeclarations: false
AlignEscapedNewlines: Right
AlignOperands: true
AlignTrailingComments: true
AllowAllParametersOfDeclarationOnNextLine: true
AllowShortBlocksOnASingleLine: false
AllowShortCaseLabelsOnASingleLine: false
AllowShortFunctionsOnASingleLine: All
AllowShortIfStatementsOnASingleLine: false
AllowShortLoopsOnASingleLine: false
AlwaysBreakAfterDefinitionReturnType: None
AlwaysBreakAfterReturnType: None
AlwaysBreakBeforeMultilineStrings: false
AlwaysBreakTemplateDeclarations: true # false
BinPackArguments: true
BinPackParameters: true
BraceWrapping:
AfterClass: true # false
AfterControlStatement: true # false
AfterEnum: true # false
AfterFunction: true # false
AfterNamespace: true # false
AfterObjCDeclaration: true # false
AfterStruct: true # false
AfterUnion: true # false
AfterExternBlock: true # false
BeforeCatch: true # false
BeforeElse: true # false
IndentBraces: true # false
SplitEmptyFunction: true
SplitEmptyRecord: true
SplitEmptyNamespace: true
BreakBeforeBinaryOperators: None
BreakBeforeBraces: Allman # Attach
BreakBeforeInheritanceComma: false
BreakBeforeTernaryOperators: true
BreakConstructorInitializersBeforeComma: false
BreakConstructorInitializers: BeforeColon
BreakAfterJavaFieldAnnotations: false
BreakStringLiterals: true
ColumnLimit: 80
CommentPragmas: '^ IWYU pragma:'
CompactNamespaces: false
ConstructorInitializerAllOnOneLineOrOnePerLine: false
ConstructorInitializerIndentWidth: 4
ContinuationIndentWidth: 4
Cpp11BracedListStyle: true
DerivePointerAlignment: false
DisableFormat: false
ExperimentalAutoDetectBinPacking: false
FixNamespaceComments: true
ForEachMacros:
- foreach
- Q_FOREACH
- BOOST_FOREACH
IncludeBlocks: Preserve
IncludeCategories:
- Regex: '^"(llvm|llvm-c|clang|clang-c)/'
Priority: 2
- Regex: '^(<|"(gtest|gmock|isl|json)/)'
Priority: 3
- Regex: '.*'
Priority: 1
IncludeIsMainRegex: '(Test)?$'
IndentCaseLabels: true # false
IndentPPDirectives: None
IndentWidth: 4 #2
....
Standard: Cpp11
TabWidth: 8
UseTab: Never
...- ColumnLimit: Sets the maximum line length, usually specified in terms of the number of characters per line.
- Standard: Specifies the C++ language standard to follow (in this case, C++11).
Run Code Formatting: Clang-Format could format a single file or all files with the same file extension. For example, to format
.cppextension, run the following command in the terminal.1
clang-format -i *.cpp
To format all
.h,.c,.hpp,.cpp,.cufiles together, run the following command in the terminal.1
find . -regex '.*\.\(cpp\|hpp\|cu\|c\|h\)' -exec clang-format -style=file -i {} \;
CLion Integration
In CLion, we can use ClangFormat as an alternative to the built-in code formatter.
.clang-format files with formatting conventions should be placed in the project tree. Each of them applies to code files at the same level and in the subdirectories. Having multiple .clang-format files for a single project lets you, if needed, use different styles for different code folders.
Step:
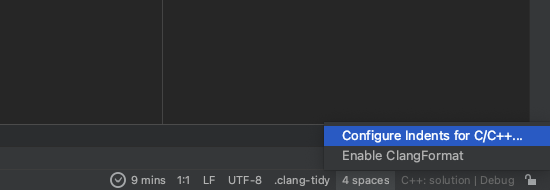
While in a .h, .c, or .cpp file, click Enable ClangFormat from the code formatting switcher in the status bar:

Alternatively, select the Enable ClangFormat checkbox in Settings | Editor | Code Style:
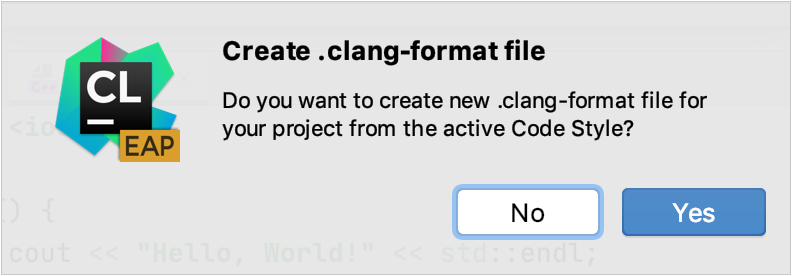
 If there is no .clang-format file under the project root, CLion will suggest creating it based on the current IDE code style settings. If you refuse, then ClangFormat will be enabled with the default LLVM style.
After you enable ClangFormat, the appropriate formatting will be applied when you:
type in the editor (which includes indentation after Enter or Backspace, auto-completion, code generation, refactorings, and quick-fixes);
call Code | Reformat Code
⌘Сmd⌥OptL- this action also lets you reformat a selection of code instead of the whole file;commit changes and select Reformat Code as the Before commit action:

CMake Integration
Discussion: integrating clang format with your build system, is it a bad idea?
https://www.reddit.com/r/cpp/comments/b2hshf/how_do_you_integrate_clang_format_with_your_build/
but here I just regard
clang-formatas a build option to have a quick formatting check, likemake format
Create a
.clang-formatfile in the root directory of your project. Set the desired formatting rules in this file according to your coding style preferences.In your CMakeLists.txt file, add a custom target that runs Clang-format as a check, like this:
1
2
3
4
5
6
7
8
9
10
11find_program(CLANG_FORMAT_EXECUTABLE NAMES clang-format)
if(CLANG_FORMAT_EXECUTABLE)
file(GLOB_RECURSE ALL_SOURCE_FILES *.cpp *.h)
add_custom_target(format
COMMAND ${CLANG_FORMAT_EXECUTABLE} -style=file -i ${ALL_SOURCE_FILES}
COMMENT "Running Clang-format"
VERBATIM
)
endif()Explain: The
if(CLANG_FORMAT_EXECUTABLE)statement checks if theclang-formatexecutable was found. If it exists, the code inside theifblock is executed.Inside the block, the
file(GLOB_RECURSE ALL_SOURCE_FILES *.cpp *.h)command uses theGLOB_RECURSEoption to recursively find all source files in the project with the extensions.cppand.h. The found files are stored in the variableALL_SOURCE_FILES.The
add_custom_target(format ...)command creates a custom target namedformat.You can also add the
formattarget as a dependency of your main build target. This ensures that Clang-format checks are performed whenever you build your project. (a bad idea?)1
2add_executable(myapp ${SOURCE_FILES})
add_dependencies(myapp format)
clang-tidy
Clang-tidy is a clang-based C++ static code analysis tool. Its purpose is to provide an extensible framework for diagnosing and fixing typical programming errors, like style violations, interface misuse, or bugs that can be deduced via static analysis. clang-tidy is modular and provides a convenient interface for writing new checks.
Here’s a comparison of Clang-tidy and Clang-format:
Feature Clang-tidy Clang-format Purpose Static analysis tool Code formatting tool Function Detects code issues and bugs Applies consistent formatting to code Analysis Identifies potential bugs and code smells N/A Stylistic Issues Provides suggestions for code improvements Automatically formats code according to rules Language Support C, C++, Objective-C C, C++, Objective-C Integration Build process, IDEs, text editors Build process, IDEs, text editors
Basic Usage
Installation(unchecked, maybe need specify version)
1
sudo apt-get install clang clang-tidy
navigate to the directory containing your source code and run the following command to analyze your code with Clang-tidy
1
clang-tidy [source_file(s)] [OPTIONS]
Replace
[source_file(s)]with the path or paths to the source file(s) you want to analyze. You can specify multiple source files separated by spaces. If you want to analyze an entire project or a directory, you can use wildcards (e.g.,*.cpp,**/*.cpp).You can also provide additional options specific to Clang-tidy. For example,
-checks=*will enable all available checksOnce you run the
clang-tidycommand, Clang-tidy will analyze your code based on the specified checks and provide warnings or suggestions for improvements. The output will be displayed in the terminal or command prompt.

CLion Integration
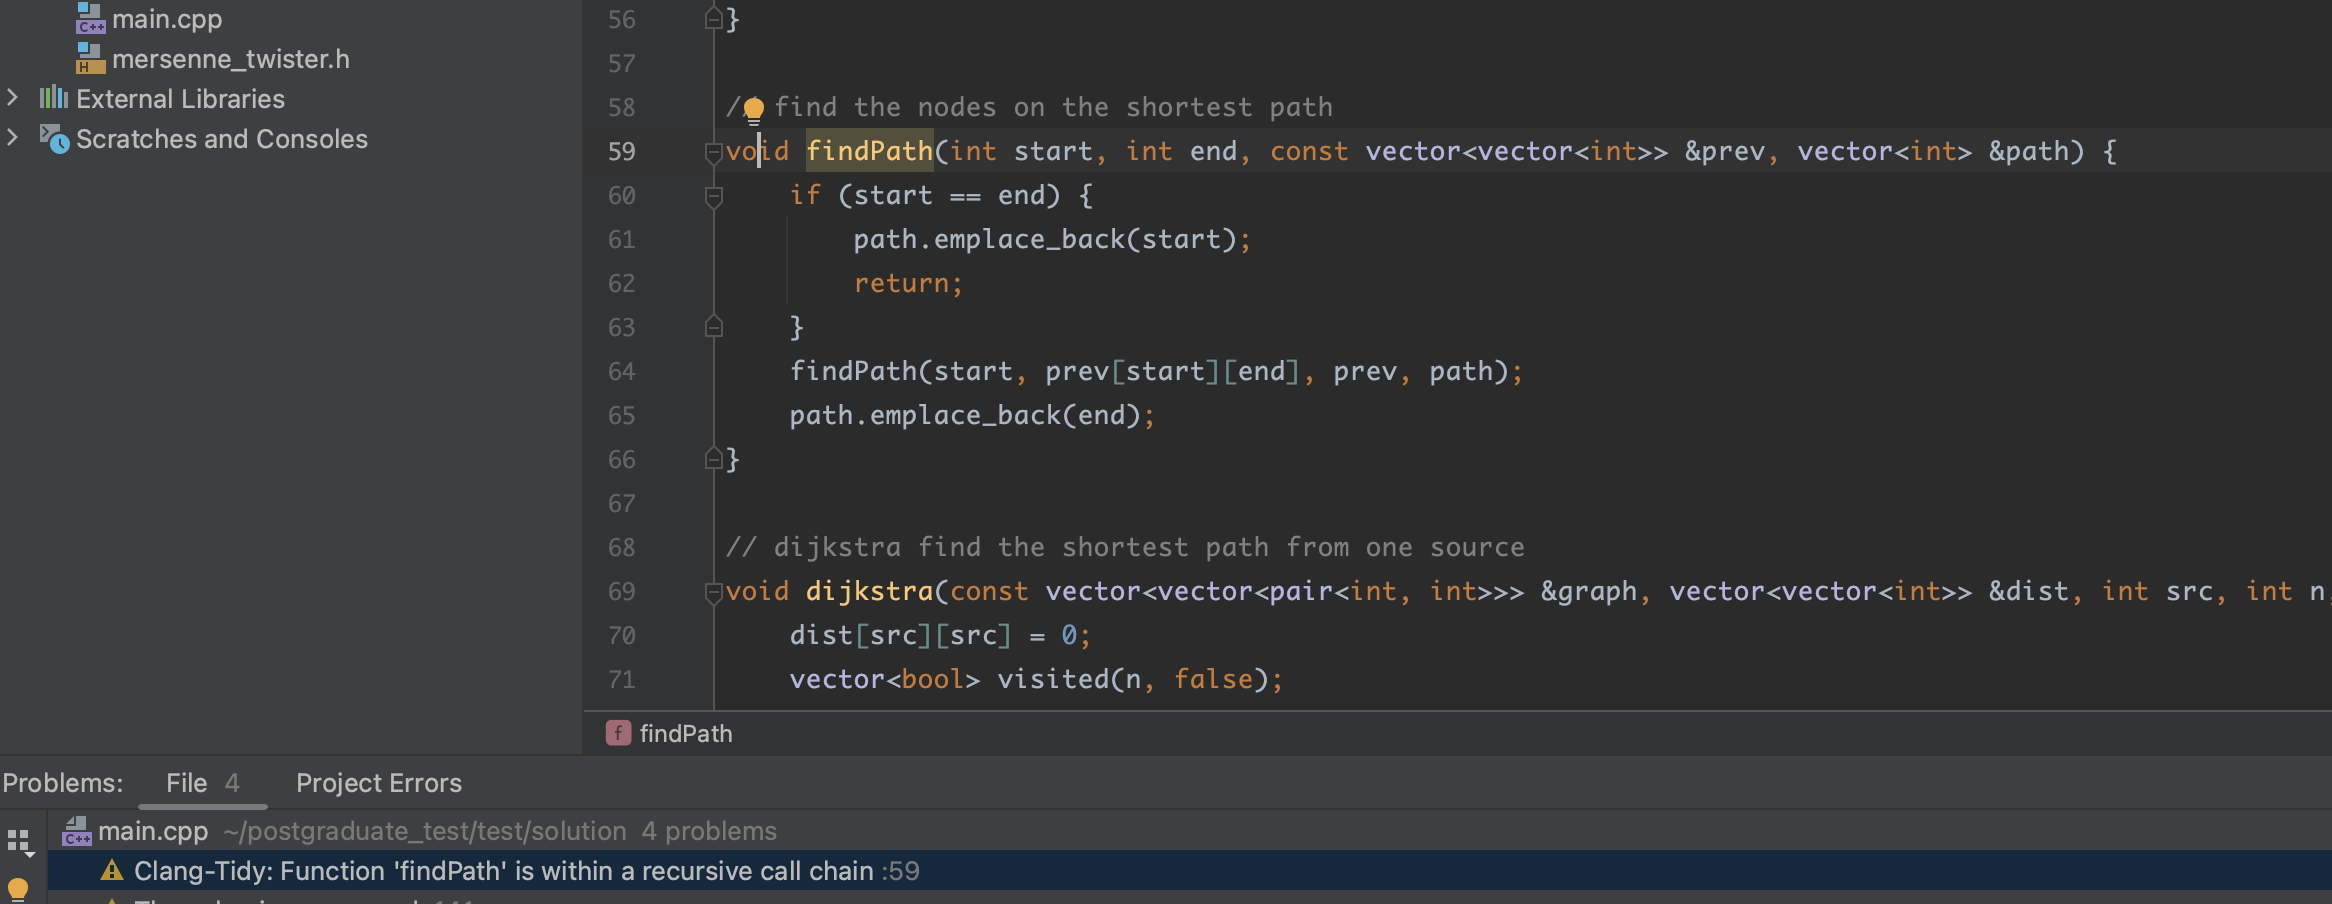
CLion shows Clang-Tidy checks the same way as its own code inspections, with quick-fixes available via the 
⌥Opt ↩Enter:
To adjust the Clang-Tidy configuration, go to Settings | Editor | Inspections | C/C++ | Static Analysis Tools | Clang-Tidy:
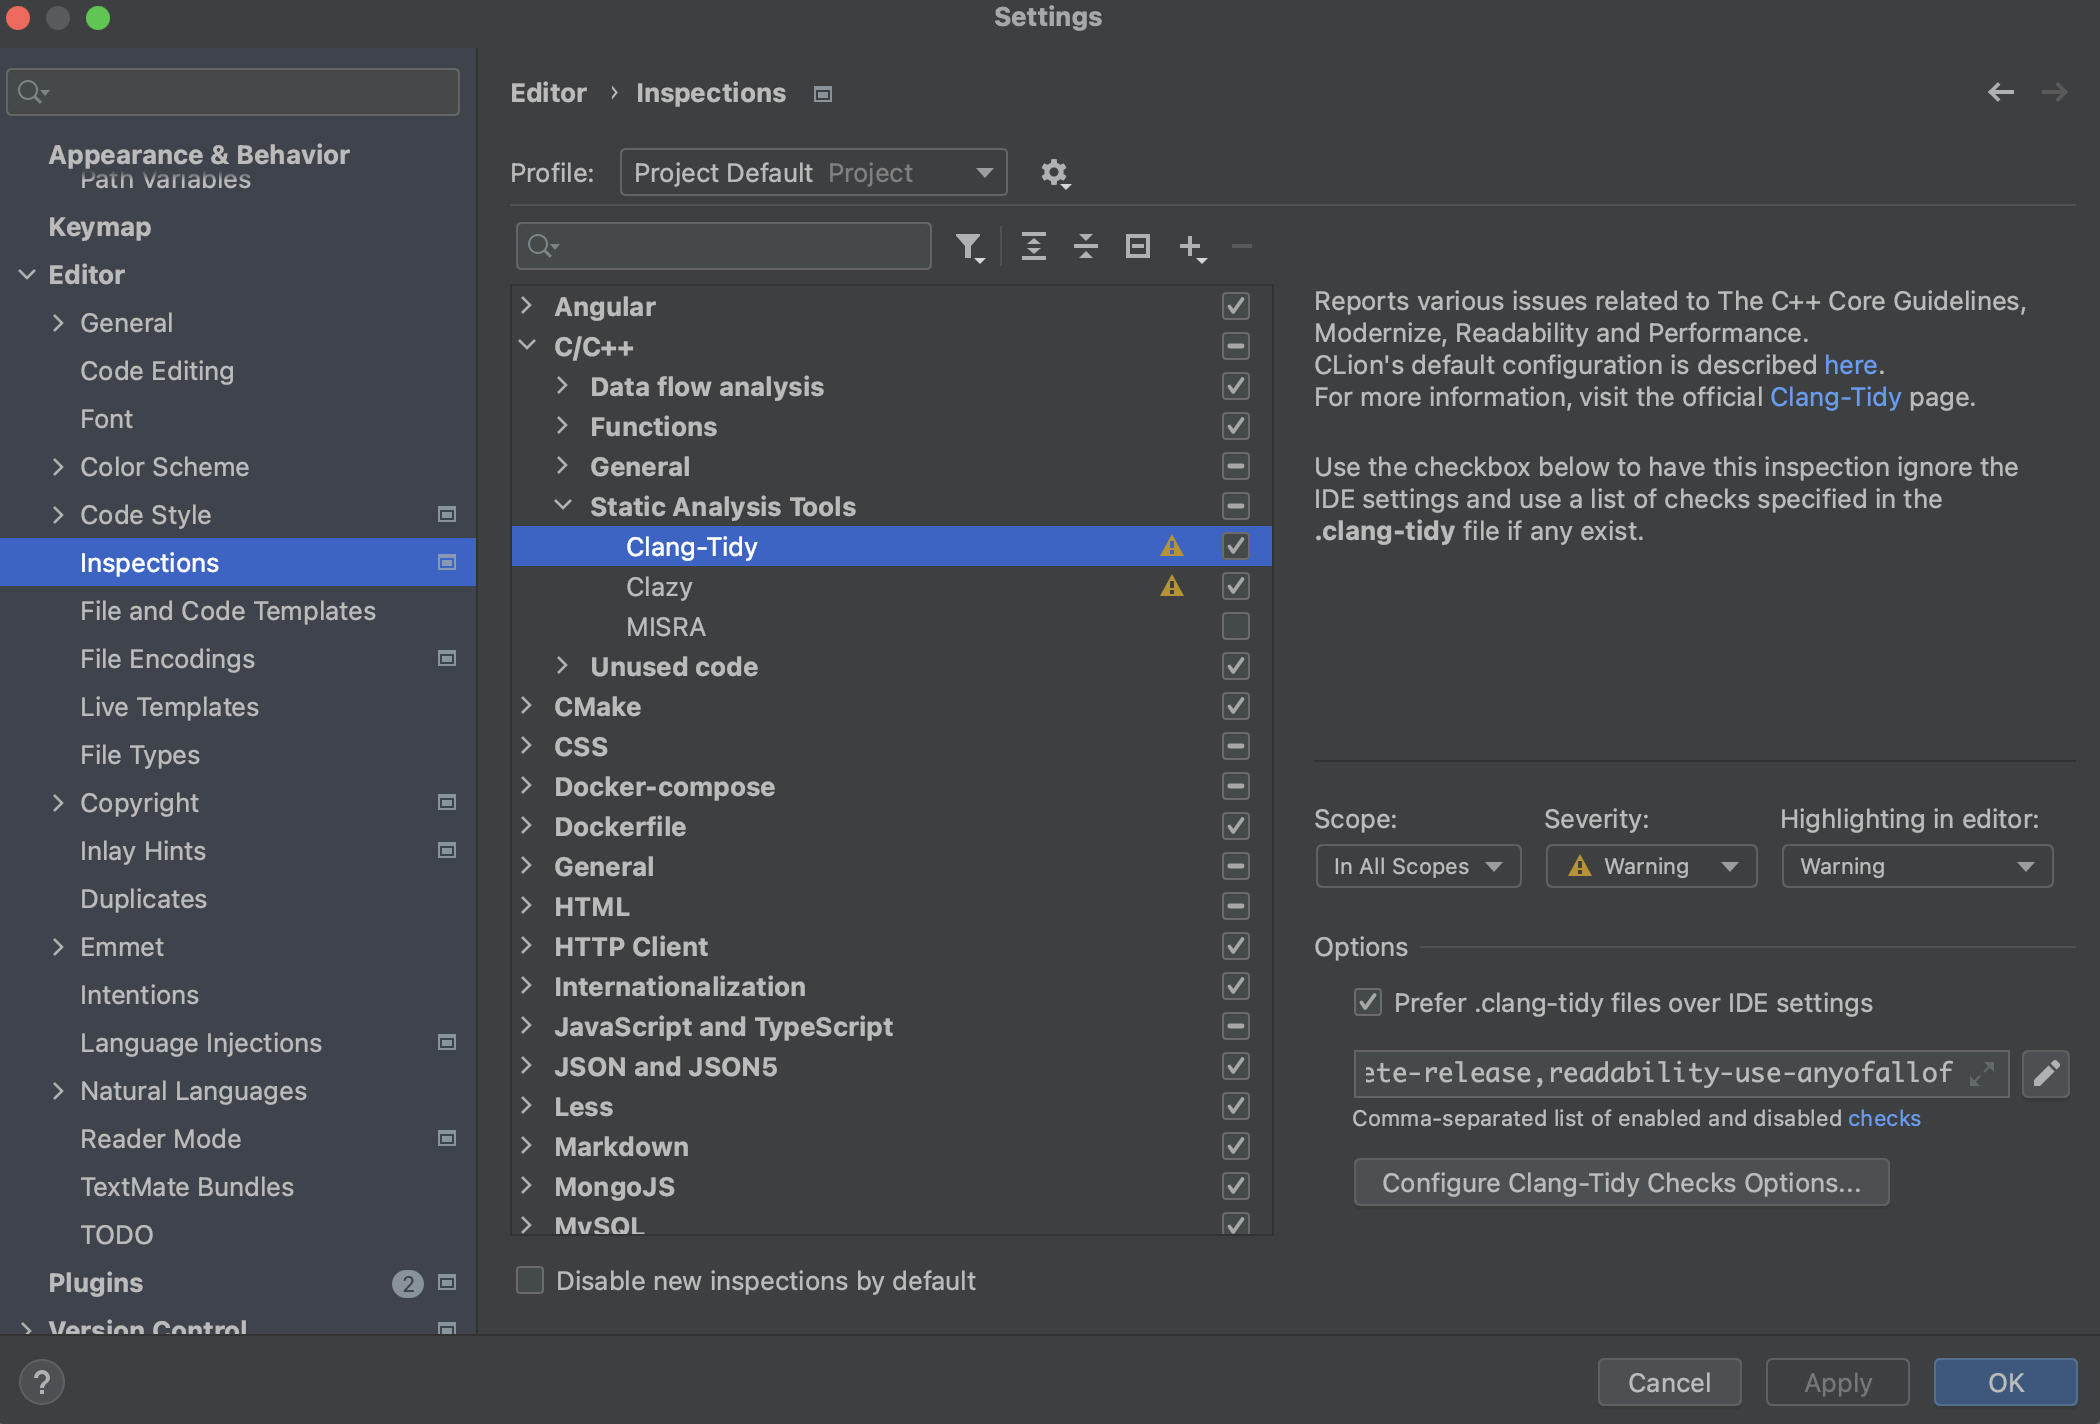
Note that not all the checks are enabled by default, Click
to open the dialog where you can edit the list of checks:
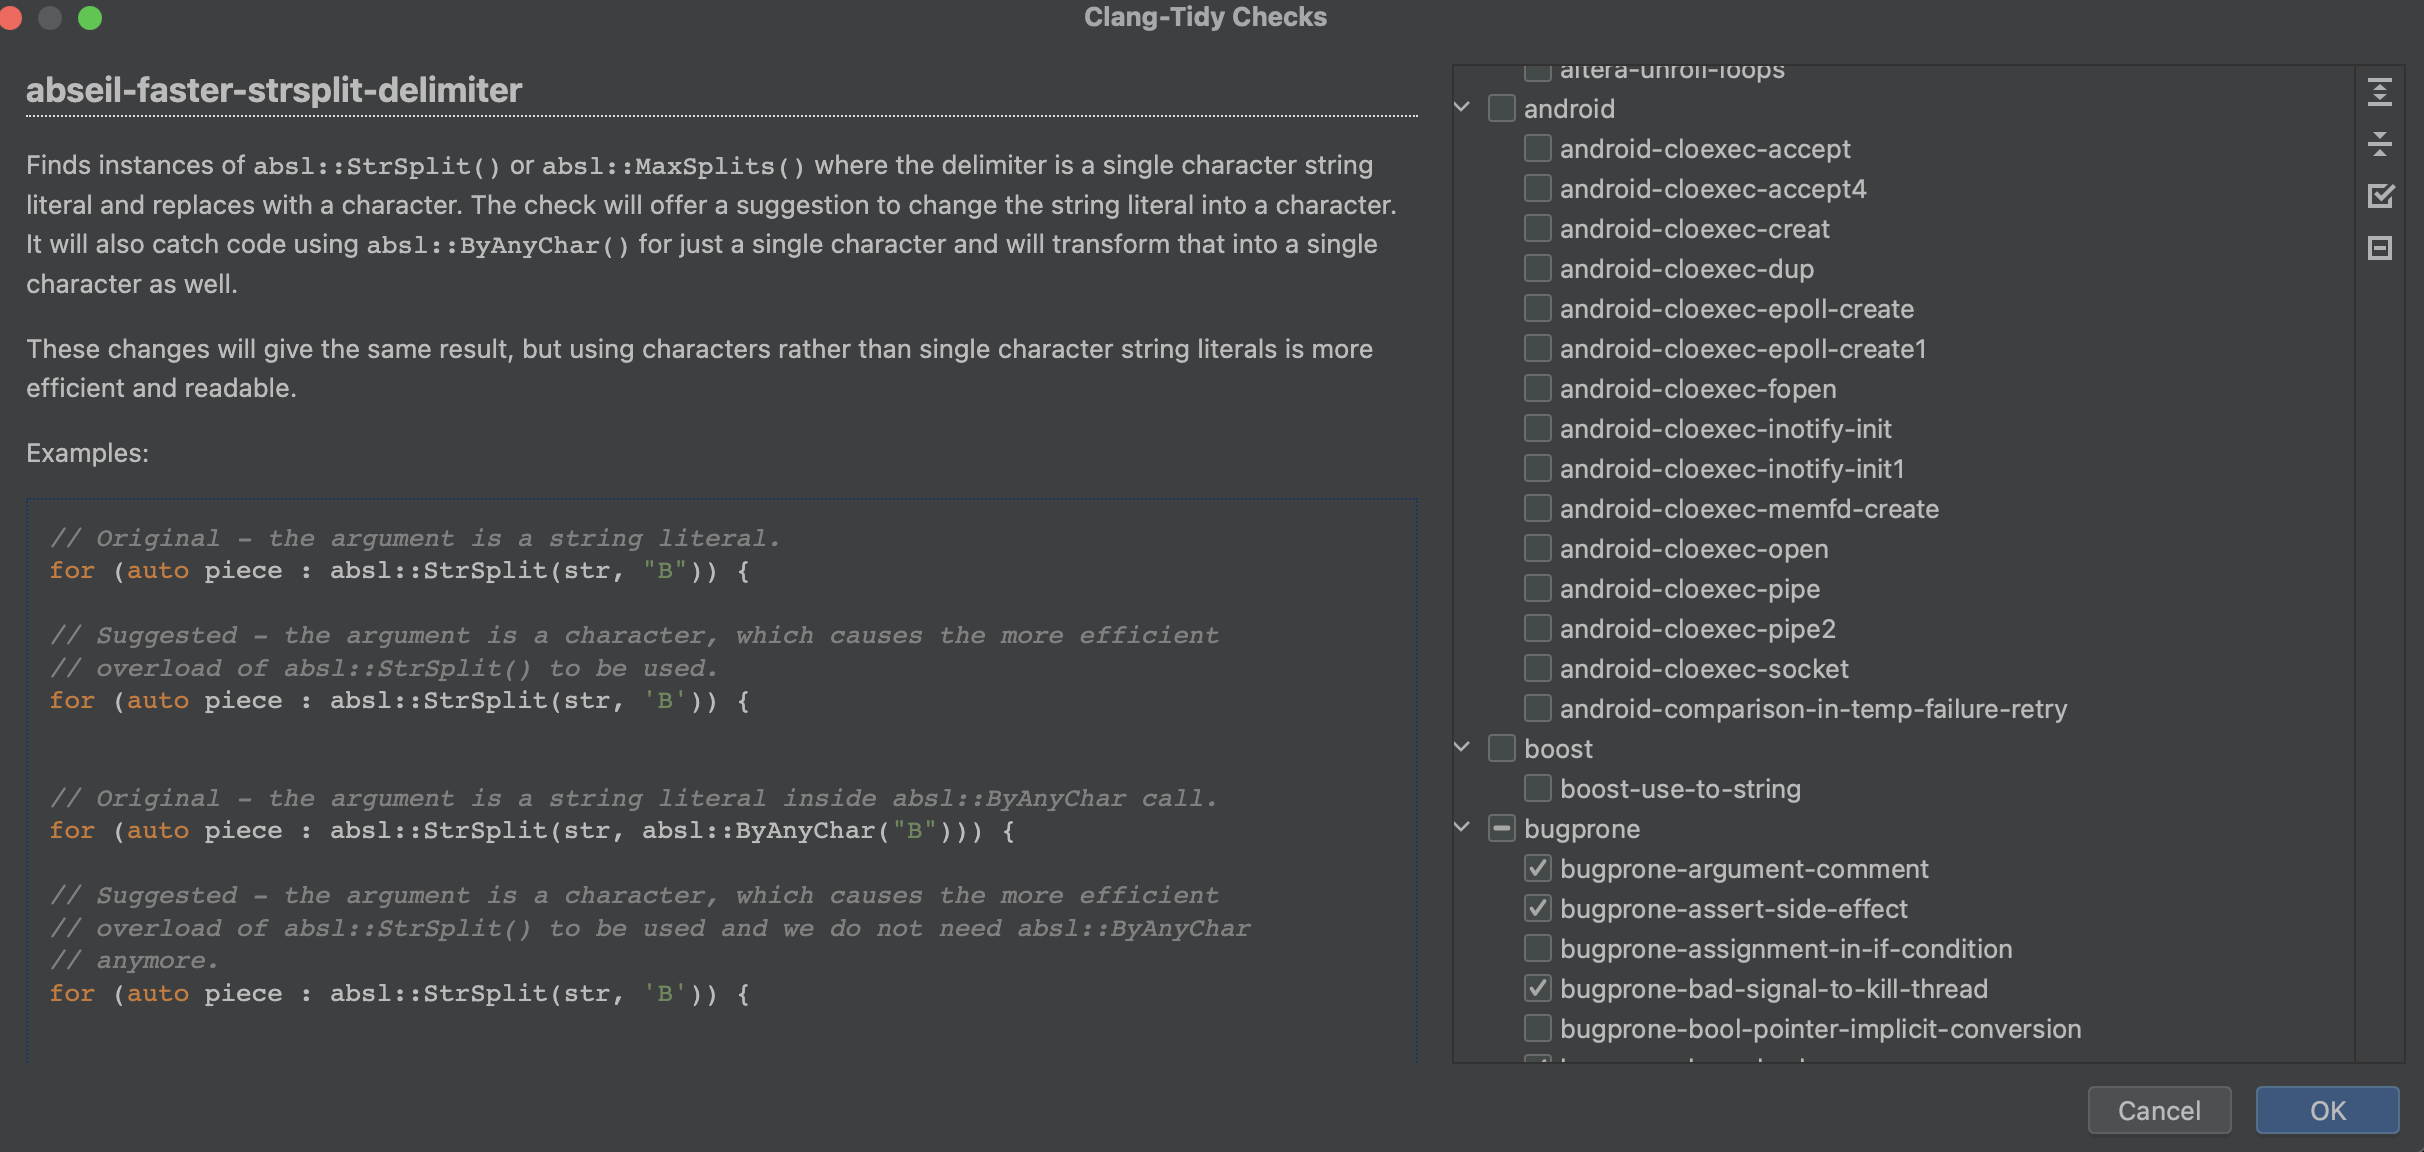
With .clang-tidy files, you can set per-directory configurations: for each source file, Clang-Tidy will attempt to read configuration from .clang-tidy in the closest parent directory. To open the .clang-tidy configuration file used by the current source file, select Edit clang-tidy file for
in the widget on the status bar: To open the .clang-tidy configuration file used by the current source file, select Edit clang-tidy file for
in the widget on the status bar: 
If there’s no .clang-tidy configuration available for the currently opened source file, you can create one by selecting Create .clang-tidy file in the widget:

The new file will include settings configured in Settings | Editor | Inspections | C/C++ - Static Analysis Tools - Clang-Tidy.
CMake Integration
Make sure Clang-tidy is installed on your system.
In your CMakeLists.txt file, add the following lines:
1
2
3
4
5
6
7
8
9
10
11
12
13
14
15
16
17
18
19set(CMAKE_EXPORT_COMPILE_COMMANDS ON)
...
set(CLANG_SEARCH_PATH "/usr/local/bin" "/usr/bin" "/usr/local/opt/llvm/bin" "/usr/local/opt/llvm@14/bin"
"/opt/homebrew/opt/llvm@14/bin/")
find_program(CLANG_TIDY_BIN
NAMES clang-tidy clang-tidy-14
HINTS ${CLANG_SEARCH_PATH})
if(CLANG_TIDY_BIN)
set(DO_CLANG_TIDY "${CLANG_TIDY_BIN};-checks=*;-header-filter=${CMAKE_SOURCE_DIR}/include/.*")
# Apply Clang-tidy to specified targets
add_custom_target(clang-tidy
COMMAND ${DO_CLANG_TIDY}
COMMENT "Running Clang-tidy"
VERBATIM
)
endif()- On my laptop, which installed llvm by homebrew, has to find clang-tidy installation path manually
- If the build process did not generate a compilation database (The primary purpose of the compilation database is to provide accurate compilation environment information to code analysis tools like clang-tidy or Clangd), clang-tidy won’t be able to find it. Ensure that you have enabled the generation of compilation database in your build system.